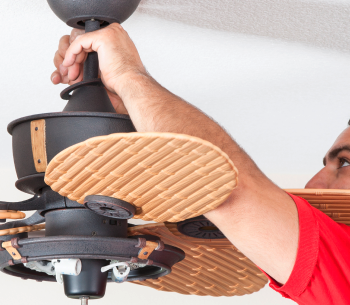
March might still be a cold and rainy month for the Pacific Northwest, but that doesn’t mean you shouldn’t begin spring cleaning. One great way to start this annual deep cleaning involves cleaning off your home’s ceiling fans.
To avoid damaging your fan and setting it up properly for the summer months, our experts have created the following guide to help you clean it safely:
- Gather Supplies To Clean Your Fan – Depending on the height of your fan, you’ll need to grab a step stool or ladder to reach the top of the fan, a soft dry microfiber cloth or sponge, glasses, a tarp or old sheet to catch dust, and an all-purpose cleaning solution.
- Turn Off The Switch To The Fan – Cleaning the fan while it is operating could cause damage to the blades or you to get hurt.
- Place The Sheet & Ladder Under The Fan – Make sure the tarp or sheet is spread out as much as possible. That way, the dust and debris will fall onto this instead of your carpet or flooring. The ladder or step stool should be secure on top of this sheet before you climb up to clean.
- Wearing Protective Eyewear – Standing under the fan or near it will put you directly under falling dust and debris as you clean. To avoid dust, dirt, and the all-purpose cleaner from accidentally getting into your eyes, it’s wise to wear glasses, goggles, or other protective eyewear while cleaning.
- Place The Cleaning Solution On The Sponge or Cloth Only – The cleaning solution should only be placed on the towel or sponge as you go to clean the panels. Doing this will prevent the panels from becoming stained, scratched, or warped from the solution as you clean them.
- Gently Clean The Bottom & Top Of Each Panel – There should be no need to scrub these panels with the soft sponge, towel, and cleaning solution you use. The accumulated dust should either stick to the towel as you gently wipe each blade or fall onto the sheet you’ve spread out below.
- Let The Blades Dry Before You Use The Fan – If you turn on the ceiling fan too soon, any dust or debris that is floating around will stick to your fan again. Your fan should completely dry in at least an hour or two. If you’re looking to speed up the drying process, take a dry towel and gently brush it over the blades before turning on the fan.
Cleaning your ceiling fan seems like a relatively easy, safe, and simple task, but it’s also important to take the above precautions to protect yourself and this appliance. If you’re standing up higher than a foot or two to clean your fan’s blade, then you should also make sure another person is present to hold the ladder or stool you’re standing on. Added support is always a good idea when you’re cleaning objects in higher places in your home.
Which Way Should A Ceiling Fan Turn In The Summer and Spring?
In addition to spring cleaning, you’ll need to change the direction of your ceiling fan when warmer weather arrives in Oregon. During the winter months, your ceiling fan should turn clockwise to push cooler air up and warmer air down.
In the summer months, you want your ceiling fan to turn counterclockwise so that cooler air can be pushed down. To switch your fan from a clockwise to a counterclockwise rotation, you’ll need to locate a switch on the central component of the fan above the blades. There should be a sliding or toggle switch that you will press in the opposite direction.
Once you’ve located and turned over this switch, you can turn on your fan to see if the blades are rotating counterclockwise.
Seamless Ceiling Fan Installations With Roth
If you’re looking to get a new ceiling fan installed before warmer weather arrives, then you should contact Roth Home, Plumbing, Electrical & Drain Services. Once your appointment is secure, our experts will be in touch with you to tell you when we are on our way, how your new ceiling fan will work, and answer any questions you might have before we depart.
To schedule your appointment, please contact our customer service team now.


